Always late to the party, I find that I am only now really digging into the artsy side of this hobby. I've developed a strong interest in creating an art journal, and in fact, will begin that process this weekend while I'm away at a retreat. Don't get me wrong, I have TONS of artsy supplies already - paints, stains, inks, sprays, mists, even gesso. And I love getting messy and seeing what I can create. I just have yet to translate that into my regular scrappy routine.
At any rate, I've been on the hunt for videos and tutorials showing how to use certain products, and I came across this video, which triggered my memory of this thread on 2Ps, in which a generous poster shared her recipe for making your own modeling paste. I just had to try it!
So I started by gathering my supplies: talcum powder, Elmer's glue, acrylic paint, a craft stick, and a screw-on lidded container.

Measured out 1/2 cup of the powder,

2 tablespoons of the glue,

and 2 tablespoons of the paint. The original poster suggested using white paint. I didn't have any, so I used cream instead. For my purposes, it worked great.

The next step was to stir. I found that the mixture was a little too dry, so I added what probably amounted to another tablespoon of the glue.

Then I got the consistency I had hoped for. To be honest, I've never used "real" modeling paste, so I didn't really know what I was after.

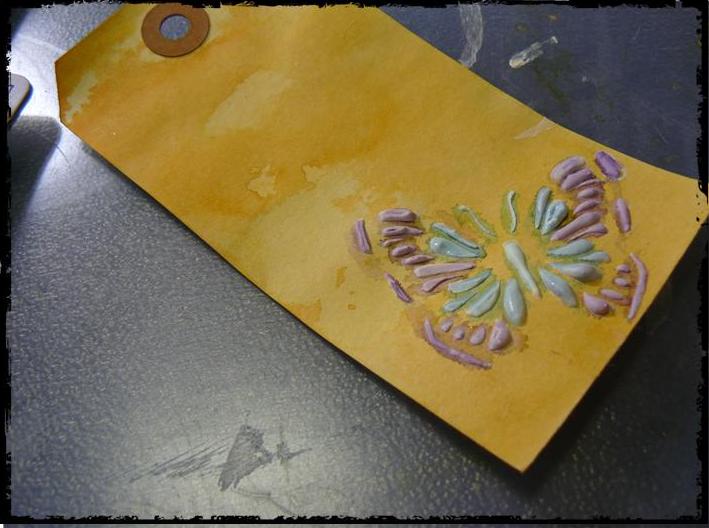
So now that my recipe was complete, I wanted to test out the final product on an actual project! I started with a plain manila tag, then did a quick watercolor technique with Distress Inks.

Bonus DIY: I so loved the butterfly from the video that I wanted to recreate it. I still have Make the Cut software on my little old personal Cricut, so I was able to cut the images I wanted and to place them where I wanted them to be. I'm not sure, but I *THINK* Silhouette users have the same ability. Anyway, I did a Google images search for "butterfly stencil," came up with TONS of images, and chose a bunch that I liked. Grouped them together on the virtual mat, set it to multi-cut 5 times, loaded a 6 x 6 stencil blank, and bam! Custom stencils!

The homemade paste went on like butter.

It worked exactly as I had hoped it would. I hit it with the heat gun for a little bit to hurry
along the drying process.

Finally, I used my two favorite Distress Ink colors - Broken China and Dusty Concord - to wash over the paste. Next time I'll probably just use a mist, but I like the funky effect of this well enough. And, bonus - it smells sweet too!
So there you have it! Go mix up a batch and show me what you do with it!
Here's that recipe, directly from the post on 2Ps:
1/2 cup Baking Soda or Talcum Powder
2 Tablespoons PVA glue ( the white glue that dries clear)
1-2 Tablespoons acrylic paint. ( I usually use white )
Mix all together and store in an airtight container. I found that the talc gives a smoother texture than the baking soda. .....and it smells nice too. You may need to add a few drops if water to get the right consistency.
(Quoting kiwifarmer)
P.S. Make-the-Cut software has a pixel trace function that allows the images I found on Google to be converted to cut files.
P.P.S. There is no way I can find time in my schedule to do a DIY Friday post every week, so at this point I'm aiming for more like once a month, probably the first Friday of every month. I hope you enjoy them!